Highlights
- You don’t need a fancy camera to take good photos—your phone will work just fine.
- Bright, indirect natural light is best for shooting jewelry.
- Consider backdrop colors, potential models, and any textures you want to include to complement your pieces.
Solid product photography can make all the difference to your business; it’s an opportunity to showcase the quality of your items, share your aesthetic, and entice shoppers to buy. This is especially true when it comes to jewelry, but taking photos that capture the glint of gemstones and tiny metalwork details can take some practice and planning. Jewelry photography can also set the tone for your brand and give retailers ideas for how to style the pieces. With just a couple of shots, you can communicate that your bracelets look best stacked or that mixing metals is cool again.
Even if you’re new to photography, you can take beautiful, clear, and compelling shots of your pieces. Below we’ll dive into what you need to get started with jewelry photography and how to make your images shine.
What you’ll need to photograph like a professional
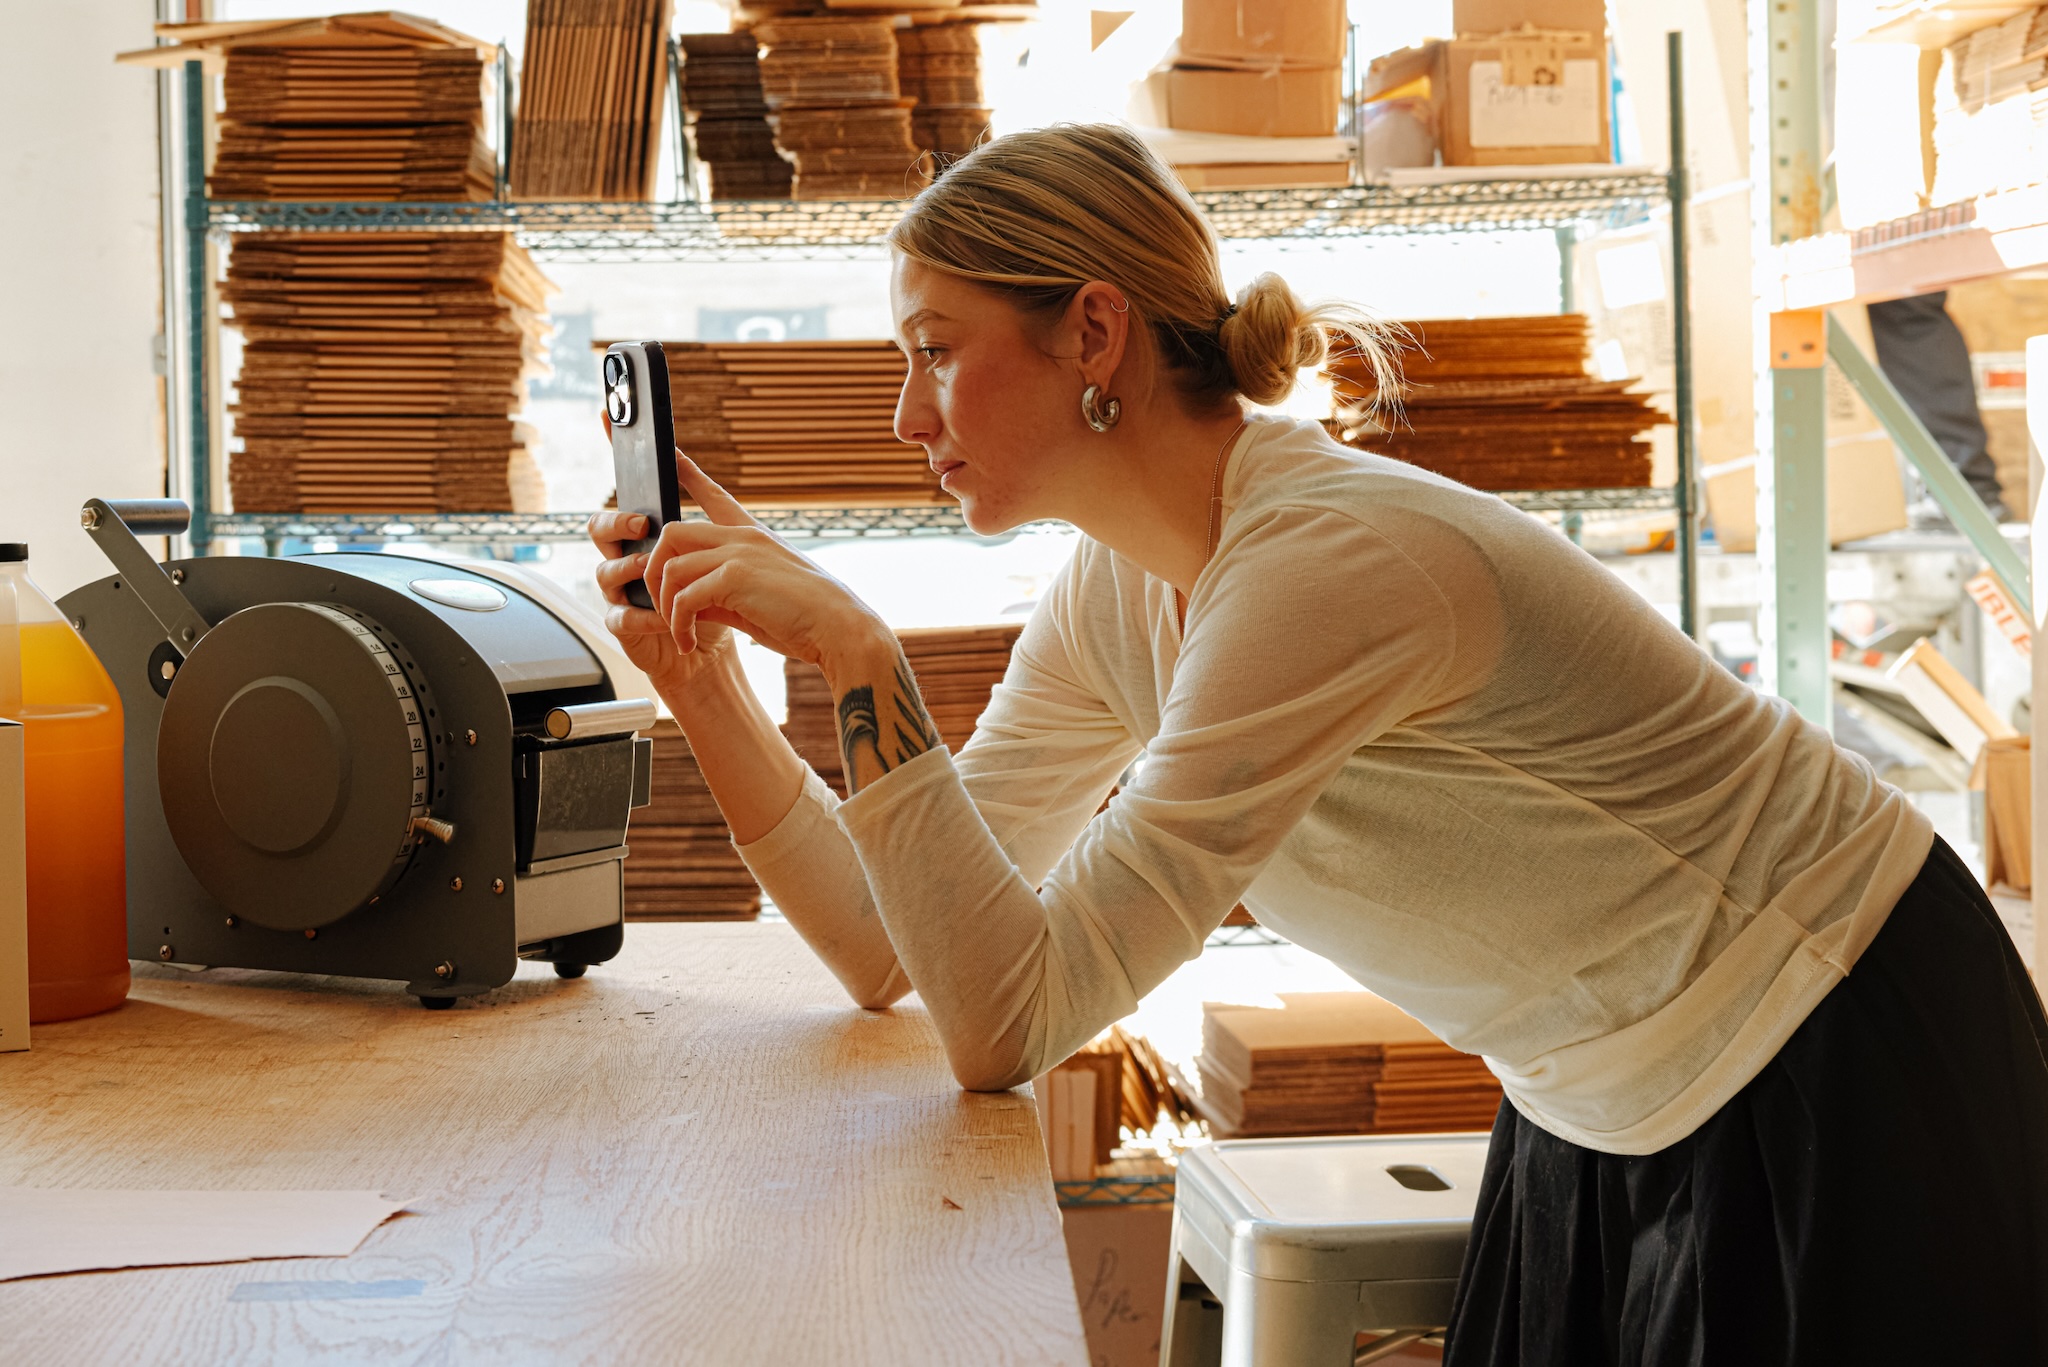
You don’t need a fancy new camera to take great photos … some simple preparation can go a long way. If you aren’t in a photo studio, here are a few items to ensure you get the best shots.
Camera: Good news: You can absolutely use your iPhone or Android to take photos, especially if you have a more recent model. If you have a DSLR camera, that’s a great option too.
Tripod: Whether you’re using a DSLR camera or your phone, you’ll need a tripod to keep the camera in a fixed position. This ensures your pictures will be consistent (and not shaky!). For larger jewelry, you may want a floor tripod, but for smaller setups, you can use a handheld or tabletop one.
Paper sweep: For a professional-looking background, use a paper sweep. These handy (and affordable) backgrounds come in a range of colors to suit whatever atmosphere and aesthetic you like. If it gets dirty, simply cut it from the bottom and roll down some more.
Lighting: The best lighting is natural sunlight. If you can, set yourself up next to a window to maximize the light. But if you have extra sparkly jewelry, you may want additional lighting to capture the glint. Diffusing direct light with a sheer curtain can help minimize glare.
Foam boards/bounce cards: Foam boards or bounce cards with a shiny side are great tools for directing light. You can create more ambient lighting, minimize shadows, or go for a dramatic look.
Use models to bring your jewelry to life:
Displaying jewelry on a model can add some style and personality to your photos, but even more importantly, it provides a sense of scale. Seeing an item on a model can help shoppers and retailers decide if it’s too big, too small, or just right.
Ready, set, snap! Steps to photograph jewelry with confidence
- Clean: First things first: Make sure your jewelry is clean. Wipe pieces down with a microfiber cloth or use polish or an ultrasonic cleaner to minimize smudges and fingerprints. If you’re going to use your hands in the photos, make sure they’re clean and consider a clear or neutral nail polish.
- Tweak your camera settings: If you’re using a phone, make sure your camera has at least 12 megapixels and an autofocus feature. Use the rear-facing camera (not selfie mode) and tap the screen to focus where you want. Experiment with portrait mode, zoom, and exposure options to find the right look! If you’re using a DSLR, set the ISO as low as possible and use aperture settings of f/11 or higher.
- Set the stage: Gather your props and set up your sweep near direct, natural light. Avoid really strong, bright light so you don’t wash out your items or create glares. Place your camera or phone on a tripod directly in front of the piece you want to shoot.
- Make a shot list: Take some time to consider what exactly you want to capture. How many items are you shooting? Are there any particular angles you want? Do you need to show scale? Will you pair items together or show off your unique packaging? Writing it all down ensures you won’t miss anything when you’re in the zone.
- Snap some photos: It’s time to shoot! Play around with different angles to make sure you capture the detail of your pieces. Consult your shot list to keep you on track.
- Retouch and edit: You can use your phone or an editing software to adjust things like brightness, contrast, and saturation to really make your jewelry pop. You may also want to do some retouching in case there’s glare, scratches, or dust. It may be helpful to invest in photo editing software or find tutorials online. Check out programs like Adobe Photoshop or Canva to get started.
Get some inspiration from Faire brands
Sometimes the best way to learn is to look to the experts. Let’s take a look at some examples of excellent jewelry photography from some of our favorite brands on Faire. You might start to home in on the style of photography that’ll work best for your pieces.
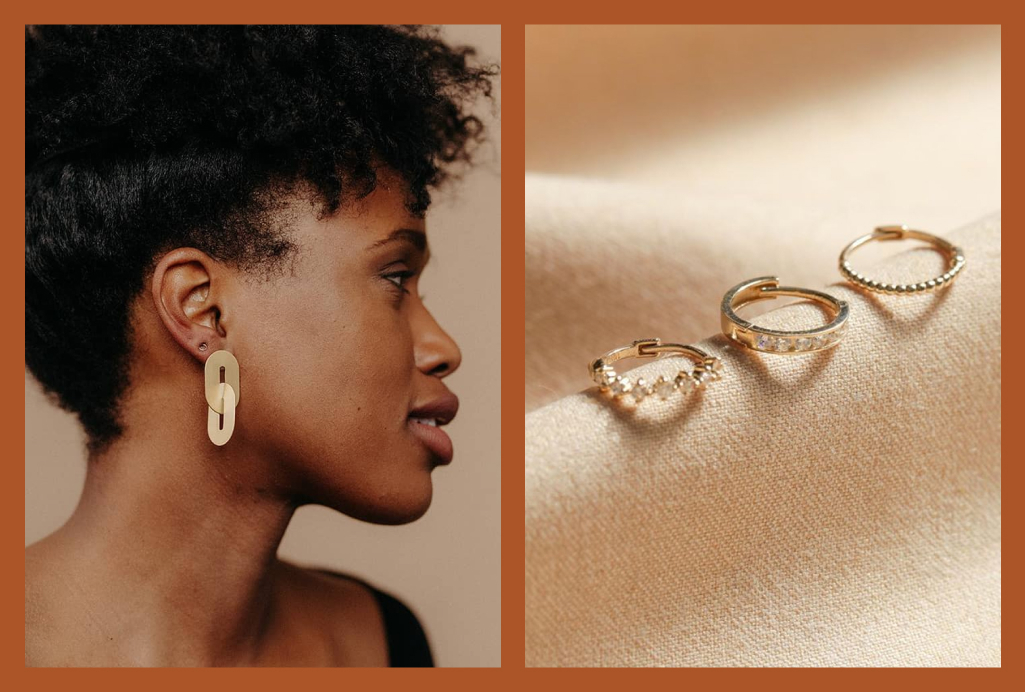
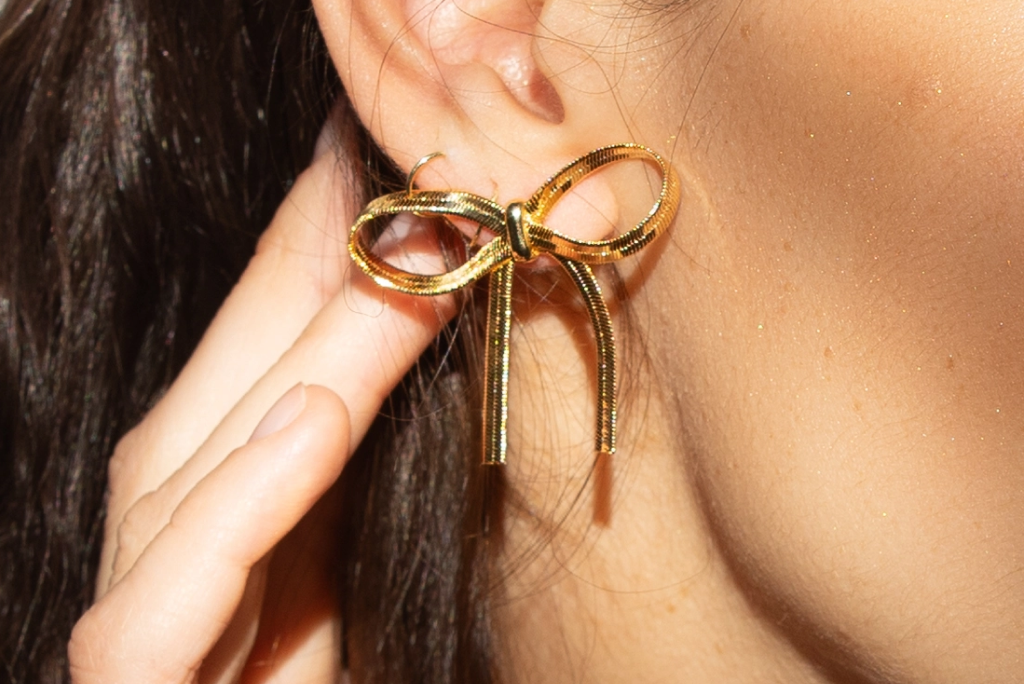
Peter and June is a great example of a brand that shows off its personality but still keeps the jewelry front and center. Let’s take a look at one of its products. Shot on the model, these golden bows have just the right amount of shine. Notice how they play with shadow without ever sacrificing clarity?
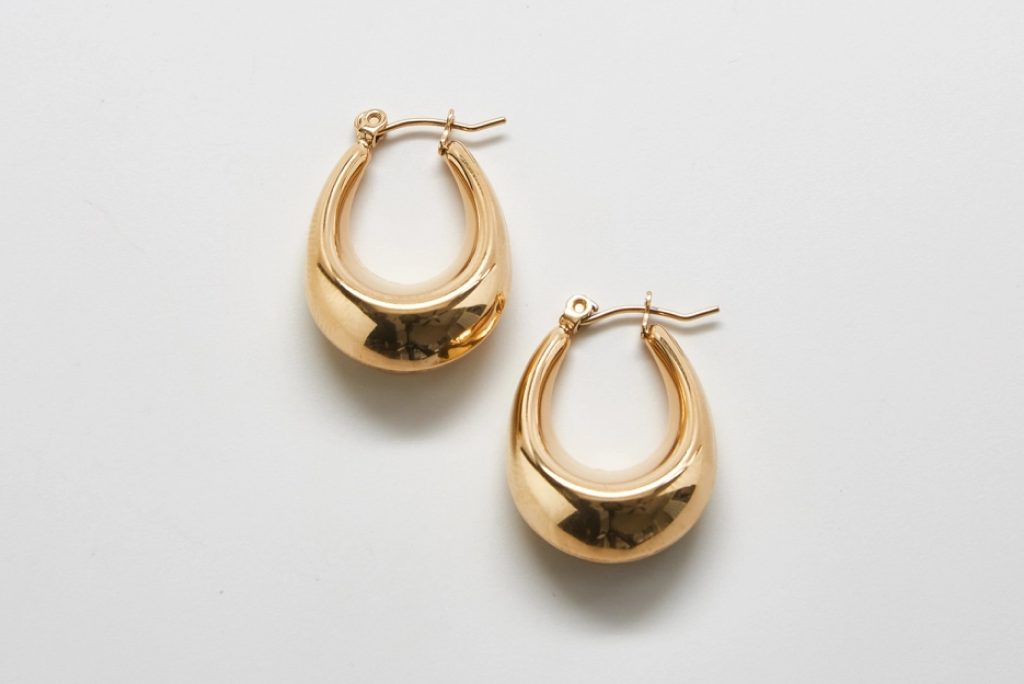
Admiral Row keeps things simple with a clean white background. The distraction-free sweep keeps shoppers’ eyes on the jewelry. You’ll see that the quality of the photos is extremely high, and clarity seems to be a top priority for the brand.
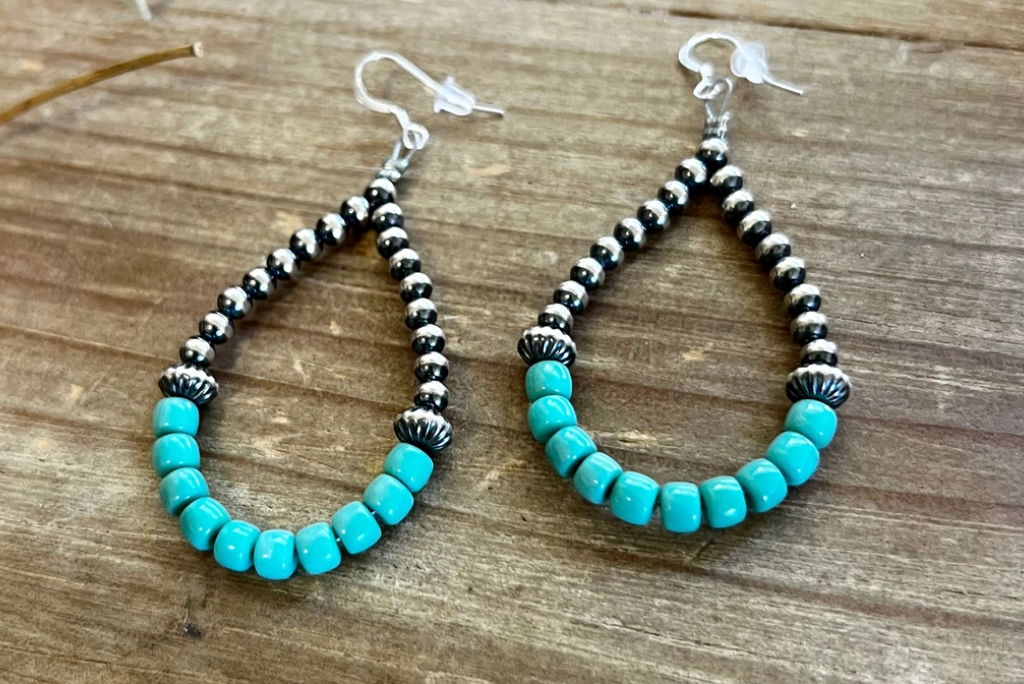
The Bijoux FAB makes great use of props. See how the brand uses a rustic wood background, flower petals, and desert plants to telegraph its Southwestern roots? You can say a lot about yourself as a brand without having to write a sentence.
An image is worth a thousand words, so take some time to create polished product photos. Even without a photography background, you’re well-equipped to take the professional-looking shots your beautiful jewelry deserves.